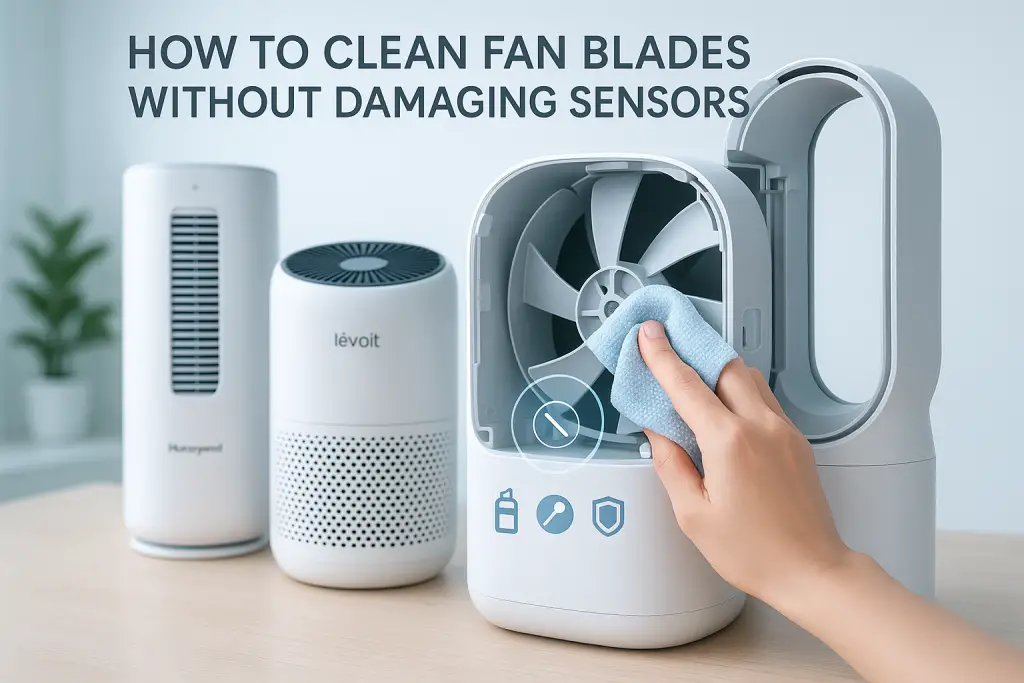
Cleaning air purifier fan blades without damaging sensitive sensors requires careful attention to detail and proper techniques. Improper cleaning can lead to damaged sensors, reduced air quality detection, and potentially void your warranty. This comprehensive guide will help you safely clean fan blades while protecting the delicate sensors that keep your air purifier functioning correctly.
Understanding Air Purifier Sensors and Their Importance
Before attempting to clean your air purifier, it’s essential to understand what sensors are, where they’re located, and why they’re critical to your unit’s performance. Air purifiers use various sensors to monitor air quality, adjust fan speeds, and provide accurate readings of your indoor environment.
Common Air Purifier Sensor Types
Air purifiers utilize several different types of sensors to monitor your air quality. Each type has specific vulnerabilities during cleaning.
- Particle/dust sensors: These use laser or infrared technology to detect small particles in the air. They’re highly sensitive to moisture and physical damage.
- VOC/gas sensors: These detect volatile organic compounds and other gases. They can be damaged by cleaning chemicals or excess moisture.
- Temperature/humidity sensors: These monitor environmental conditions. They’re typically less delicate than particle sensors but still require careful handling.
Different sensor technologies offer varying levels of accuracy and durability. Laser-based particle sensors provide more precise readings than other sensor types, but they’re also more sensitive to improper cleaning.
Sensor Locations in Popular Air Purifier Brands
Sensor locations vary by brand and model. Here’s where to find them in popular air purifiers:
- Dyson: Sensors are typically located near the control panel and in small recessed areas within the air path.
- Levoit: Usually located behind small openings near the control panel or within the air intake grill.
- Honeywell: Often positioned behind the control panel or near the air quality display.
- Coway: Usually located behind small vents on the front panel.
If you’re uncertain about the exact location of sensors in your model, consult the user manual or manufacturer’s website. Many modern air purifiers connect to home networks, and mesh networks offer more stable connections for air quality sensors than traditional Wi-Fi in larger homes.
Preparing to Clean Your Air Purifier Safely
Proper preparation is essential for protecting your air purifier’s sensitive components. Follow these steps before you begin cleaning.
- Unplug the air purifier completely and wait at least 30 minutes for all electronic components to discharge.
- Place the unit on a clean, flat surface with good lighting.
- Review your owner’s manual for any specific disassembly instructions or warnings.
- Gather appropriate cleaning tools and materials.
- Take photos of the assembly before disassembly to help with reassembly later.
Essential Cleaning Tools and Supplies
Using the right tools can make cleaning safer and more effective while protecting sensitive components.
- Soft brushes: Small paintbrushes or makeup brushes work well for delicate areas.
- Microfiber cloths: Lint-free and gentle on electronic components.
- Compressed air: Use canned air with a straw attachment for precision.
- Cotton swabs: For tight spaces and corners.
- Isopropyl alcohol (70-91%): For stubborn grime, but use with extreme caution near sensors.
Avoid harsh chemicals, abrasive materials, and vacuum attachments that could create static electricity. Before cleaning the fan, you might need to clean or replace the pre-filter. Pre-filters capture larger particles and help extend the life of your main filter and keep fan blades cleaner.
Disassembly Guide for Different Air Purifier Models
Different air purifier models require specific disassembly steps. Follow these model-specific guides to safely access the fan blades.
Dyson Models:
- Remove the outer shell by pressing release buttons typically located at the base.
- Carefully separate the filter section from the motor housing.
- Note sensor positions (usually small black boxes or openings) before proceeding.
Levoit Models:
- Remove the back panel by pressing down on the release tab.
- Take out the filter assembly.
- Access the fan section with caution, noting sensor locations (often near the control panel).
Honeywell Models:
- Open the front grill using the finger tabs or latches.
- Remove filters as directed in the manual.
- Access the fan assembly, being mindful of sensor wires and connections.
When handling any air purifier, always check for early warning signs of clogged filters. Diagnosing a weak fan or clogged filter early can prevent the need for extensive cleaning later.
Safe Fan Blade Cleaning Methods by Sensor Type
The cleaning method you choose should depend on the sensor types in your air purifier. Here are the safest approaches for different sensor configurations.
Dry Cleaning Techniques for Sensitive Components
Dry cleaning methods are generally safest for electronic components and sensors. Follow these techniques to remove dust without introducing moisture.
- Compressed air method: Hold the can upright, at least 4-6 inches away from components. Use short bursts rather than continuous spraying to prevent freezing of components.
- Soft brush technique: Use gentle sweeping motions away from sensors. Never brush directly on sensor openings.
- Microfiber cloth: For fan blades, gently wipe in the direction of the blade curve. Avoid applying pressure near sensor areas.
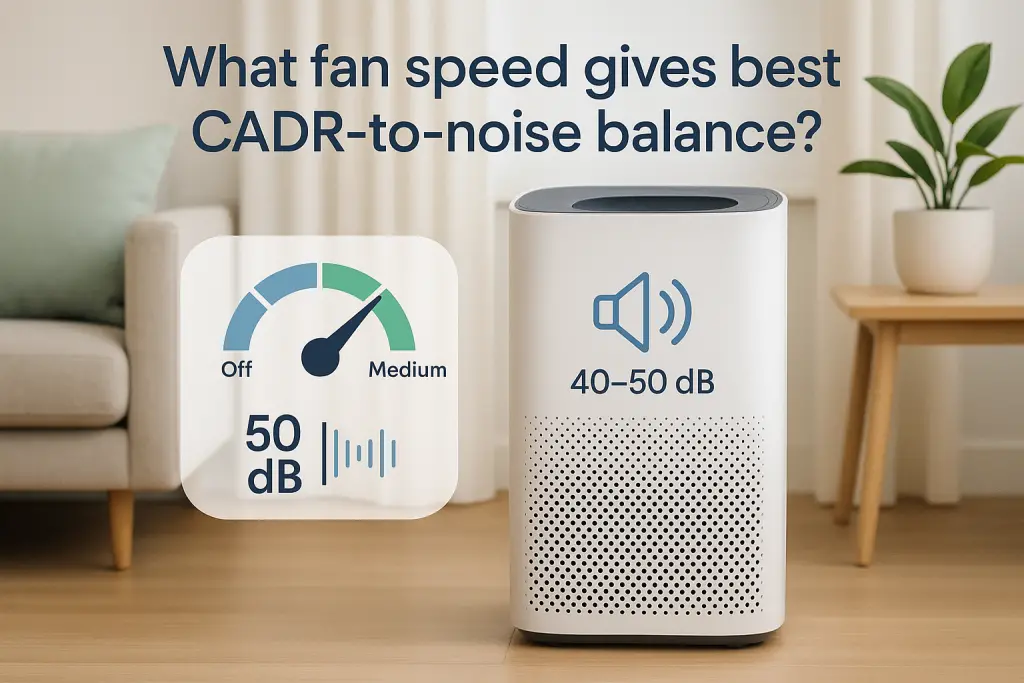
For stubborn dust in hard-to-reach places, use a cotton swab slightly dampened with distilled water, then immediately follow with a dry swab. Fan speed affects both cleaning frequency and performance. Understanding what fan speed gives the best CADR to noise balance helps you optimize your air purifier’s performance between cleanings.
When and How to Use Damp Cleaning Safely
Sometimes dry cleaning isn’t enough for dirty fan blades. Here’s how to use damp cleaning methods without risking sensor damage.
- Only use damp cleaning on metal or plastic fan blades with no visible electronics or sensors.
- Prepare a cleaning solution of distilled water with a tiny drop of mild dish soap.
- Dampen (not wet) a microfiber cloth with the solution. It should be barely moist.
- Wipe fan blades gently, avoiding any nearby sensors or circuit boards.
- Immediately follow with a dry microfiber cloth to remove any moisture.
- Allow the unit to fully air dry for at least 24 hours before reassembly.
Never use cleaning solutions directly on or near sensors. For units with visible connectivity components, be cautious around antenna areas. Bluetooth and Wi-Fi sensors have different vulnerabilities when exposed to moisture or cleaning agents.
Brand-Specific Cleaning Guidelines
Different air purifier manufacturers have specific recommendations for cleaning. Follow these brand-specific guidelines to maintain warranty coverage and ensure proper operation.
Dyson Air Purifier Fan Blade Cleaning
Dyson air purifiers feature sophisticated sensor systems that require special attention during cleaning. Here’s how to clean fan blades in different Dyson models.
For Bladeless Models (TP04, HP04, etc.):
- After disassembly, locate the impeller (internal fan) at the base of the unit.
- Use compressed air to blow dust from the impeller blades, keeping the can at least 6 inches away.
- For visible dirt, use a soft brush to gently sweep away debris.
- Avoid touching the laser particle sensor (small rectangular component) typically located near the air path.
Dyson specifically warns against using liquids or cleaners on their sensors. Their particle detection technology requires particularly delicate handling. Remember that fan power directly affects cleaning performance. Fan power matters significantly in maintaining pressure drop across filters, which impacts overall air purification efficiency.
Levoit and Honeywell Air Purifier Cleaning Guidelines
Levoit and Honeywell air purifiers have different internal configurations. Follow these manufacturer-specific guidelines for safe cleaning.
Levoit Models:
- After accessing the fan, use a soft brush to remove loose dust from fan blades.
- For Core-series models, avoid touching the laser sensor located near the control panel area.
- Clean the air intake grill with a dry microfiber cloth.
- Never use liquid cleaners on sensor areas marked with small openings or vents.
Honeywell Models:
- After accessing the fan assembly, use compressed air in short bursts to remove dust.
- For tower models, carefully clean fan blades with a soft brush, moving in the direction of the blade.
- Avoid using any liquids near the electronic control panel area.
- Pay special attention to keeping the air quality sensor area (usually marked with small vents) clean but dry.
How to Clean Fan Blades Without Damaging Sensors
Following this step-by-step process will help you clean fan blades effectively while protecting sensitive components:
- Identify sensor locations: Before beginning, locate all sensors in your unit using your manual or the guidelines above.
- Create a “no-go zone”: Mentally mark a 1-inch perimeter around any sensor as an area to avoid direct cleaning.
- Start with the gentlest method: Begin with compressed air to remove loose dust and debris.
- Progress as needed: If compressed air isn’t sufficient, move to soft brush cleaning, then to slightly dampened microfiber only if absolutely necessary.
- Clean in sections: Work on one portion of the fan blade at a time rather than aggressive all-over cleaning.
- Use barriers when needed: If cleaning near sensors, use a piece of cardstock to shield the sensor from cleaning activities.
Remember that over-cleaning can be as problematic as under-cleaning. Aim for the minimum intervention needed to restore proper function.
Verifying Sensor Function After Cleaning
After cleaning, it’s essential to verify that your air purifier’s sensors are functioning correctly. Here’s how to test and troubleshoot sensor operation.
Testing Sensor Accuracy Post-Cleaning
To ensure your sensors are working correctly after cleaning, follow these testing procedures based on sensor type.
Particle Sensor Test:
- Reassemble and plug in your air purifier.
- Let it run for 30 minutes to stabilize.
- Create a small amount of dust nearby (clap erasers or shake a dusty cloth several feet away).
- Watch for sensor response: air quality indicator should change, or fan speed should increase automatically.
VOC Sensor Test:
- Allow the purifier to stabilize for 30 minutes.
- Open a bottle of essential oil or vinegar several feet from the unit.
- The VOC or gas indicator should register a change within minutes.
Troubleshooting Sensor Issues After Cleaning
If your air purifier isn’t reading correctly after cleaning, try these troubleshooting steps before seeking professional help.
Common Issues and Solutions:
- No sensor response: Try a power reset by unplugging for 2 minutes, then restarting.
- Constant “poor air quality” readings: The sensor may be dirty. Try running the unit in a different room to see if readings change.
- Erratic readings: Check for loose connections or reset to factory settings following manual instructions.
Model-Specific Resets:
- Dyson: Press and hold the power button for 10 seconds until the display flashes.
- Levoit: Press and hold the filter reset button for 3 seconds.
- Honeywell: Turn off, unplug for 1 minute, then restart.
If issues persist after cleaning and reset attempts, contact the manufacturer. Continuing to use an air purifier with malfunctioning sensors may result in poor air quality or unnecessary filter usage.
Maintenance Schedule to Protect Sensors
Establishing a regular maintenance schedule helps prevent buildup that requires intensive cleaning. Follow this timeline to protect your sensors and extend your air purifier’s life.
- Weekly: Wipe exterior surfaces with a dry microfiber cloth.
- Monthly: Check pre-filters and clean or replace as needed.
- Quarterly: Use compressed air to gently clean air intake areas and accessible fan portions.
- Semi-annually: Perform a more thorough cleaning of fan blades if your model allows safe access.
- Annually: Check sensor function and clean the entire unit following manufacturer guidelines.
Adjust this schedule based on your environment. Homes with pets, high cooking activity, or located in dusty areas may require more frequent maintenance.
FAQs About Cleaning Air Purifier Fan Blades and Sensors
Can I use water to clean my air purifier fan blades?
You should avoid using water directly on fan blades when sensors are nearby. If absolutely necessary, use a barely damp microfiber cloth and immediately dry thoroughly. Never use water near electronic components or sensors.
Will cleaning damage my air purifier’s warranty?
Most manufacturers allow basic cleaning, but invasive disassembly may void your warranty. Check your manual for approved cleaning methods. If in doubt, contact the manufacturer before proceeding.
How do I know if I’ve damaged a sensor?
Signs of sensor damage include consistently inaccurate readings, failure to detect obvious air quality changes, error codes on the display, or the unit running constantly at high speed regardless of air conditions.
Can I use alcohol or other disinfectants on fan blades?
Isopropyl alcohol (70-91%) can be used sparingly on metal fan blades located away from sensors. Apply to a cloth first, never directly on components. Never use household cleaners or disinfectant sprays.
Is professional cleaning worth the cost?
For expensive models with complex sensor systems or if you’re uncomfortable with disassembly, professional cleaning may be worthwhile. Many manufacturers offer cleaning services that won’t void your warranty.
Conclusion: Balancing Cleanliness and Sensor Protection
Maintaining your air purifier’s fan blades while protecting sensitive sensors requires careful attention to detail, but the benefits are worth the effort. Regular, gentle cleaning prevents performance issues and extends your unit’s lifespan. Always prioritize sensor protection over aggressive cleaning, and when in doubt, opt for the gentlest method available.
Remember that each air purifier model has unique requirements. Following manufacturer guidelines and the techniques outlined in this guide will help ensure your air purifier continues to provide clean, healthy air while maintaining accurate sensor readings.
| Photo | Air Purifier Model | Best for | Price |
|---|---|---|---|

|
WINIX A231 Air Purifier | Asthma & Indoor Pollution | Check Price On Amazon |

|
Rabbit Air, A3 SPA-1000N Air Purifier | Pet Dander & Odors | Check Price On Amazon |

|
LEVOIT Air Purifier | Best Overall | Check Price On Amazon |

|
GermGuardian Air Purifier | Cigarette & Cooking Smoke | Check Price On Amazon |

|
Coway Airmega Air Purifier | New-borns | Check Price On Amazon |

|
BLUEAIR Air Purifier | Germ & Virus Control | Check Price On Amazon |