Detecting weak fans or clogged filters early in your air purifier helps prevent poor indoor air quality and expensive repairs. These problems often develop gradually, making them easy to miss until your unit stops working effectively. By learning simple diagnostic techniques, you can identify early warning signs, maintain optimal performance, and extend your air purifier’s lifespan.
Why Early Detection Matters: The Science Behind Air Purifier Performance
Detecting air purifier problems early isn’t just about convenience—it can significantly impact your indoor air quality and the lifespan of your device. When an air purifier’s performance declines slowly, many users fail to notice until the unit is severely compromised.
According to EPA standards, indoor air can be 2-5 times more polluted than outdoor air. When your air purifier isn’t functioning properly, those pollution levels rise, potentially affecting respiratory health. This is especially important for those with allergies and asthma who rely on air purifiers for symptom relief.
Regular filter replacements cost between $20-$100 depending on your model. Most filters last 6-8 months, but this varies significantly based on your environment:
| Photo | Popular Air Purifiers | Price |
|---|---|---|

|
Air Purifiers for Home Large Room up to 1500ft², Tailulu H13 True HEPA Air Purifier for Pets Dust Odor Smoke, Air Purifier for Bedroom with 15dB Quiet Sleep Mode for Bedroom Office Living Room | Check Price On Amazon |
|
Afloia Air Purifier for Home, 4-in-1 Washable Filter for Allergies, Covers Up to 1076 ft², Quiet Operation, Auto Shut-Off & Night Light, Removes Pet Dander, Pollen, Dust, Mold, and Smoke, White,Pluto | Check Price On Amazon |

|
Nuwave OxyPure ZERO Air Purifier with Washable and Reusable Bio Guard Tech Air Filter, Large Room Up to 2002 Ft², Air Quality Monitor, 0.1 Microns, 100% Capture Irritants like Smoke, Dust, Pollen | Check Price On Amazon |

|
Air Purifiers for Home Large Room Up to 1,996 Ft², EOEBOT Air Purifier for Home Pets with Washable Filter, Quiet Sleep Mode, Air Quality Monitor, Air Purifier for Bedroom, Pet Hair, Dust, Smoke, White | Check Price On Amazon |
|
Afloia 2 IN 1 Air Purifier with Humidifier Combo, 3-Stage Filters for Home Allergies Pets Hair Smoker Odors, Evaporative Humidifier, Auto Shut Off, Quiet Air Cleaner with Seven Color Light,White | Check Price On Amazon |
- Homes with pets: Filters may need replacement 2-3x more frequently
- Urban locations: Higher pollution leads to faster clogging
- Allergy seasons: Pollen and mold increase filter load
Air purifiers work through a simple airflow system: the fan pulls air through filters that capture particles, then releases clean air back into the room. When either component falters, your Clean Air Delivery Rate (CADR) drops, sometimes by 50% or more before you notice obvious signs.
Fan vs. Filter Issues: How to Tell the Difference
Before diving into specific diagnostic methods, it’s crucial to understand the difference between fan issues and filter problems—they often present similar symptoms but require different solutions.
| Symptom | Fan Problem | Filter Problem | Both |
|---|---|---|---|
| Unusual Noise | Grinding, clicking, or whirring | Whistling or high-pitched sounds | – |
| Airflow | Inconsistent or pulsing | Gradually reduced | Weak overall output |
| Unit Behavior | Vibration, overheating | Longer run times | Poor air cleaning |
| Visual Clues | None typically visible | Dirty filter surface | – |
Fans create the airflow necessary to pull air through filters. The motor uses bearings and electrical components that can wear out over time or become obstructed with dust. Proper fan blade cleaning without damaging sensors is essential for maintaining efficiency.
Filters gradually collect particles until airflow becomes restricted. This progressive clogging increases resistance, forcing the fan to work harder while delivering less clean air. The combination creates a cycle of declining performance.
Common Symptoms of Fan Problems
Fan issues often manifest in specific ways that can help you identify the problem before complete failure occurs.
- Unusual or increased noise: Grinding indicates bearing failure, clicking suggests loose components, and whirring often means the fan is working harder to compensate for resistance
- Inconsistent fan speed: The fan runs at varying speeds without changing settings, often struggling then surging
- Vibration: The unit moves or shakes during operation, indicating unbalanced fan blades or motor issues
- Heat near motor area: Excessive warmth suggests the motor is overworking
- Start-stop operation: The fan begins running but shuts off unexpectedly, sometimes with a protective mechanism activating
Common Symptoms of Filter Clogging
As filters collect particles, they progressively show several telltale signs of diminishing performance.
- Visible dirt patterns: Dark discoloration that typically starts at the edges and works inward
- Reduced airflow: Noticeably less air coming from output vents compared to when the filter was new
- Extended cleaning cycles: The air purifier runs longer to achieve the same results
- Increased dust settlement: More dust collecting on surfaces despite running the purifier
- Filter indicators: Electronic indicators on many models measure either time-in-use or detect increased resistance from clogging
Understanding how to properly dispose of used filters is also important for both environmental and health reasons. Following filter end-of-life bagging and disposal best practices ensures you handle potentially contaminated filters safely.
9 Early Warning Signs Your Air Purifier Needs Attention
The following warning signs can help you detect problems early—often weeks or months before complete performance failure.
- Diminished airflow: Hold a tissue paper 6 inches from the output vent. With a healthy unit, the tissue should stand upright or at a 45-degree angle. As performance declines, the tissue will show less movement. Record this monthly to track changes.
- Unusual noise levels: Air purifiers naturally create white noise, but new sounds like rattling, buzzing, or high-pitched whining indicate problems. Use your phone’s decibel meter app to document normal sound levels when new, then check regularly for changes.
- Visible dirt accumulation: Check filters against a light source. New filters allow light to pass through evenly. As they clog, you’ll notice darker patches and reduced light penetration.
- Longer clearing times: If your purifier previously eliminated cooking odors in 30 minutes but now takes an hour, this indicates reduced efficiency.
- Returning allergy symptoms: If you or family members suddenly experience more allergy symptoms, your purifier may not be removing allergens effectively.
- Increased dust on surfaces: More frequent dusting needed around your home suggests the air purifier isn’t capturing particles as efficiently.
- Unusual smells: A hot or burning smell often indicates fan motor issues, while musty odors typically suggest mold growth on dirty filters.
- Inconsistent operation: The fan speed fluctuates without changing settings, or the unit cycles on and off unexpectedly.
- Higher power consumption: Use a power meter to check electricity usage. Increased power draw without corresponding performance indicates the motor is working harder to overcome resistance.
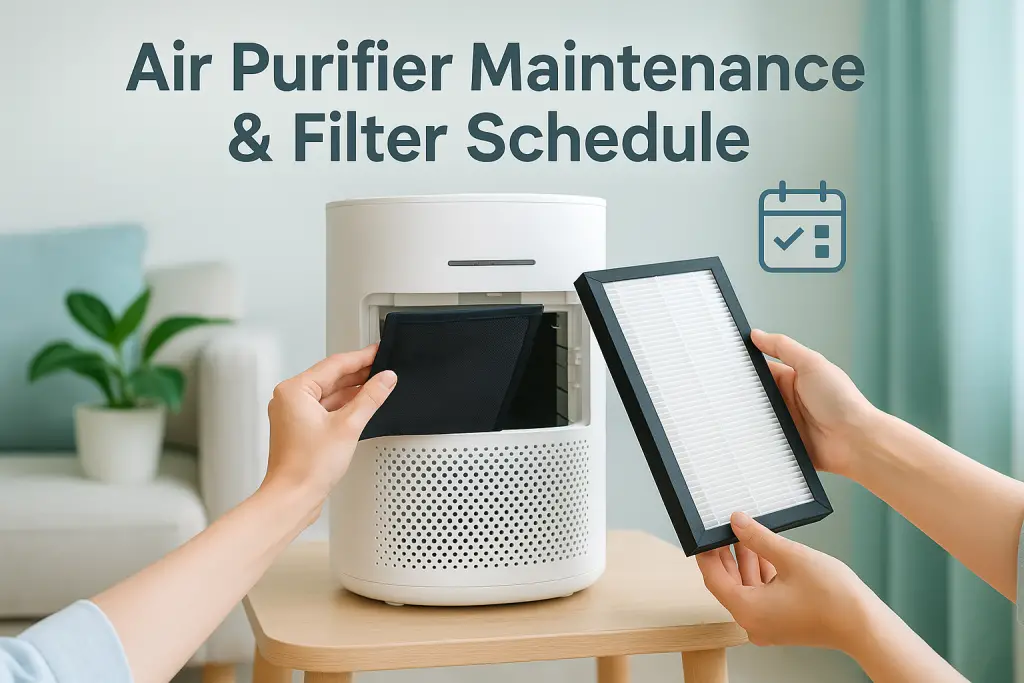
Having a regular air purifier maintenance and filter schedule helps you track these warning signs systematically and prevent most problems before they start.
DIY Diagnostic Methods Using Household Items
You don’t need expensive equipment to test your air purifier’s performance. These simple DIY methods using common household items can help you evaluate both fan strength and filter condition.
The Tissue Test: Measuring Airflow Strength
The tissue test is one of the simplest yet most effective ways to measure your air purifier’s output strength and monitor changes over time.
- Turn your air purifier to its highest setting
- Hold a single tissue paper 6 inches from the air output vent
- Observe how the tissue reacts:
- Strong airflow: Tissue extends fully horizontal or nearly so
- Moderate airflow: Tissue holds at a 45-degree angle
- Weak airflow: Tissue shows minimal movement or droops
- Record results monthly (take photos for comparison)
- Note any gradual decline in tissue movement over time
This simple test can detect a 20-30% performance reduction that might otherwise go unnoticed.
The Sound Test: Identifying Fan Motor Issues
Changes in your air purifier’s sound signature often provide the earliest warning of fan problems.
- Use a decibel meter app on your smartphone (many free options available)
- Measure sound levels from 3 feet away when the unit is new
- Record readings at each fan speed setting as your baseline
- Check monthly and note any increases in decibel readings (often indicates increased motor strain)
- Listen for specific sounds:
- Grinding: Bearing failure
- Clicking/Ticking: Loose components or debris hitting fan blades
- Buzzing: Electrical issues
- Whining: Motor struggling against resistance
The Visual Filter Check: Beyond Just Looking
There’s more to checking your filter than just looking at the surface—here’s how to perform a comprehensive visual inspection.
- Remove the filter carefully (consult manufacturer instructions)
- Hold it up to a strong light source or flashlight
- New filters allow significant light to pass through
- Clogged filters block light and show dark patches
- Check for these patterns:
- Even discoloration: Normal use
- Spotty discoloration: Larger particles like pet hair
- Dark edges with lighter center: Filter approaching end of life
- Yellow/green tint: Possible pollen or mold
- Examine filter edges for gaps or damage that allow air to bypass filtration
To avoid running out of replacement filters when you need them, consider planning your filter stock for a year based on your usage patterns and environment.
How Different Environments Affect Diagnostic Timing
Your home environment significantly impacts how quickly your air purifier’s performance may decline and how frequently you should perform diagnostics.
- Pet households: Fur and dander accelerate filter clogging by 2-3 times. Check filters monthly, perform airflow tests bi-weekly.
- Seasonal factors: Spring pollen, fall leaf mold, and winter heating season all create different airborne challenges. Increase diagnostic frequency during your region’s high-particle seasons.
- Humidity levels: High humidity (above 60%) can lead to moisture accumulation in filters, promoting mold growth and reducing efficiency. Check filters more frequently in humid conditions.
- Urban vs. rural settings: Urban environments typically have higher levels of fine particulate matter (PM2.5) and vehicle emissions, while rural areas often have more pollen and agricultural dust. Adjust your diagnostic schedule accordingly.
- Smoking households: Tobacco smoke contains extremely fine particles that rapidly clog HEPA filters. Expect 3-4 times faster degradation and check filters weekly.
- Construction or renovation: Home projects dramatically increase dust, requiring more frequent checks during and after completion.
Even your car’s cabin filters require similar attention to indoor air quality, with many of the same diagnostic principles applying to automotive cabin air filtration.
When to Clean vs. When to Replace: Making the Right Decision
Once you’ve diagnosed an issue, the next question is whether cleaning will resolve it or if replacement is necessary.
Filter Decision Guide:
- Pre-filters (fabric/mesh): Usually washable. Clean when visibly dirty or airflow decreases. Replace if torn or deformed.
- HEPA filters: Generally NOT washable. Replace when:
- Light test shows significant blockage
- Visible discoloration covers 70%+ of surface
- Tissue test shows airflow reduced by 30%+
- Filter has been in use beyond manufacturer’s recommended lifespan
- Carbon filters: Not washable. Replace when odor elimination decreases noticeably or after 3-6 months of use.
Fan Cleaning Guide:
- Turn off and unplug unit before any maintenance
- Use compressed air cans to blow dust from motor area
- Wipe accessible fan blades with microfiber cloth
- Do not use liquid cleaners on electronic components
- If unusual noise persists after cleaning, professional service may be required
Be cautious about avoiding counterfeit replacement filters when shopping online, as these can damage your air purifier and potentially release harmful materials into your air.
Preventive Maintenance Schedule to Extend Lifespan
Implementing a regular diagnostic and maintenance schedule is the most effective way to prevent unexpected performance issues and extend your air purifier’s lifespan.
Weekly Tasks:
- Visual inspection of filter surface
- Quick tissue test for airflow check
- Wipe exterior surfaces to prevent dust accumulation
Monthly Tasks:
- Complete tissue test with measurement recording
- Sound check with decibel app
- Vacuum pre-filter (if accessible without opening unit)
- Check filter indicator lights
Quarterly Tasks:
- Deep cleaning of washable pre-filters
- Thorough light test on HEPA filter
- Gentle compressed air cleaning of accessible fan areas
- Performance testing with particle counter (if available)
Annual Tasks:
- Complete unit disassembly and cleaning (per manufacturer guidelines)
- Replacement of HEPA filters (even if indicator hasn’t triggered)
- Inspection of seals and gaskets for leaks
- Motor and fan examination for wear
Adjust this schedule based on your specific environmental factors—homes with pets, smokers, or high pollen counts will need more frequent maintenance.
Advanced Diagnostic Tools Worth Considering
While household items can effectively diagnose many issues, these affordable tools can provide more precise measurements for those seeking greater accuracy.
- Air Quality Monitors ($30-$200): Devices like the Temtop M10 or Purple Air monitor measure particulate matter (PM2.5) in your room, allowing you to track your purifier’s actual cleaning efficiency. When readings start climbing despite the purifier running, it indicates reduced performance.
- Anemometers ($20-$50): These measure air speed directly from your purifier output. The Holdpeak HP-866B is an affordable option that provides exact readings in MPH or m/s to detect small airflow changes.
- Smart Plugs with Energy Monitoring ($15-$30): Devices like the TP-Link Kasa track power consumption. Increased electricity usage without setting changes indicates the motor is working harder against resistance.
- Inspection Cameras ($30-$50): Flexible endoscope cameras that connect to smartphones allow visual inspection inside units without complete disassembly.
- Humidity and Temperature Monitors ($10-$30): These help you track environmental conditions affecting your purifier’s performance and filter lifespan.
Brand-Specific Diagnostic Considerations
While the diagnostic principles we’ve covered apply to all air purifiers, certain brands have specific design features that affect how you should approach diagnosis.
| Brand | Filter Indicator Type | Common Issues | Diagnostic Tips |
|---|---|---|---|
| Levoit | Timer-based | Fan calibration drift | Reset after filter change; check bottom intake for blockage |
| Honeywell | Most models use timer-based | Pre-filter clogging | Pre-filters need frequent cleaning; check for filter settling |
| Dyson | Algorithm-based | Sensor dust buildup | Clean sensor apertures; check filter seating |
| Coway | Resistance-based | Filter indicator reliability | Don’t rely solely on indicator; use visual checks |
| Blueair | Time and some have sensor-based | Filter folding/deformation | Check filter for proper shape; inspect for bypass gaps |
Most manufacturers provide troubleshooting resources specific to their models. Check their websites or contact customer support for model-specific diagnostic procedures.
Conclusion: Creating Your Air Purifier Diagnostic Plan
Armed with these diagnostic techniques, you’re now ready to create a personalized early detection system for your air purifier.
Start by establishing your baseline performance metrics when your purifier is operating optimally. Record airflow strength, sound levels, and visual filter condition. Set a regular schedule for checks based on your environment, with more frequent diagnostics if you have pets, allergies, or live in a high-pollution area.
Don’t wait for obvious problems—the most effective approach is detecting small changes before they impact your air quality. Regular maintenance saves money by extending filter life, preventing motor damage, and ensuring you breathe the cleanest possible air.
Remember that even the best air purifiers require attention. By implementing these simple diagnostic methods, you’ll maximize your investment and maintain healthier indoor air for you and your family.
| Photo | Air Purifier Model | Best for | Price |
|---|---|---|---|

|
LEVOIT Air Purifier | Best Overall | Check Price On Amazon |

|
WINIX A231 Air Purifier | Asthma & Indoor Pollution | Check Price On Amazon |

|
Rabbit Air, A3 SPA-1000N Air Purifier | Pet Dander & Odors | Check Price On Amazon |

|
GermGuardian Air Purifier | Cigarette & Cooking Smoke | Check Price On Amazon |

|
Coway Airmega Air Purifier | New-borns | Check Price On Amazon |

|
BLUEAIR Air Purifier | Germ & Virus Control | Check Price On Amazon |