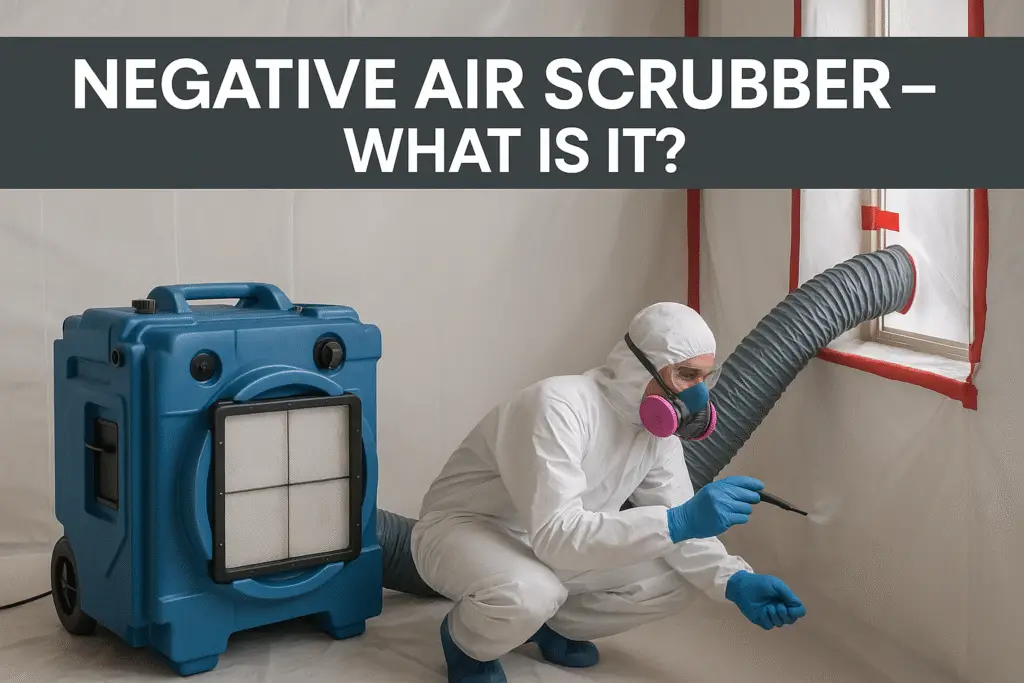
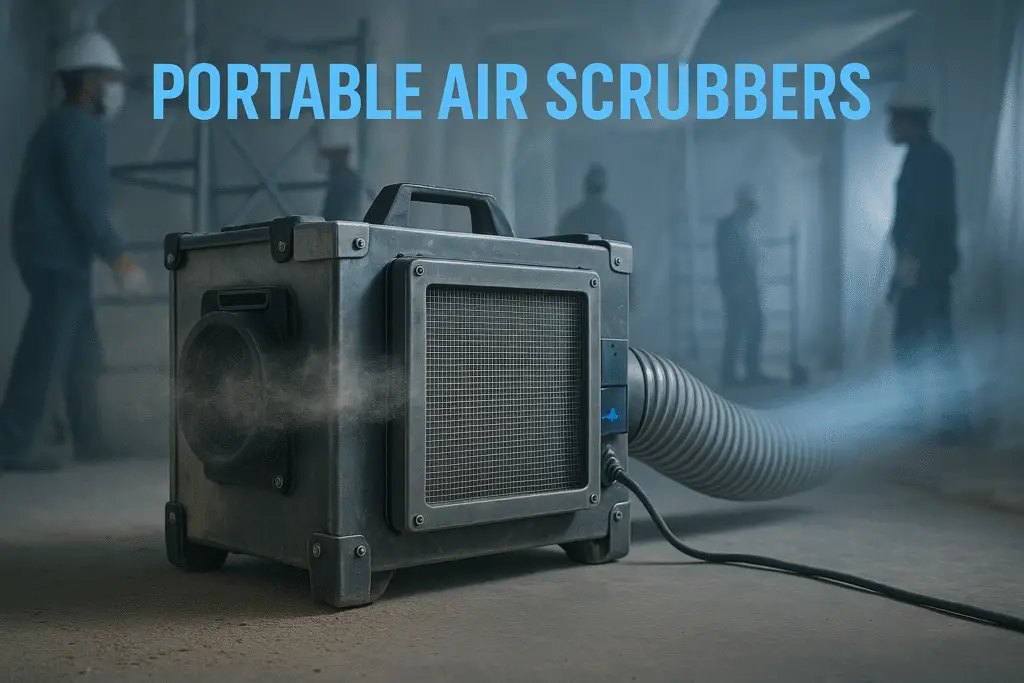
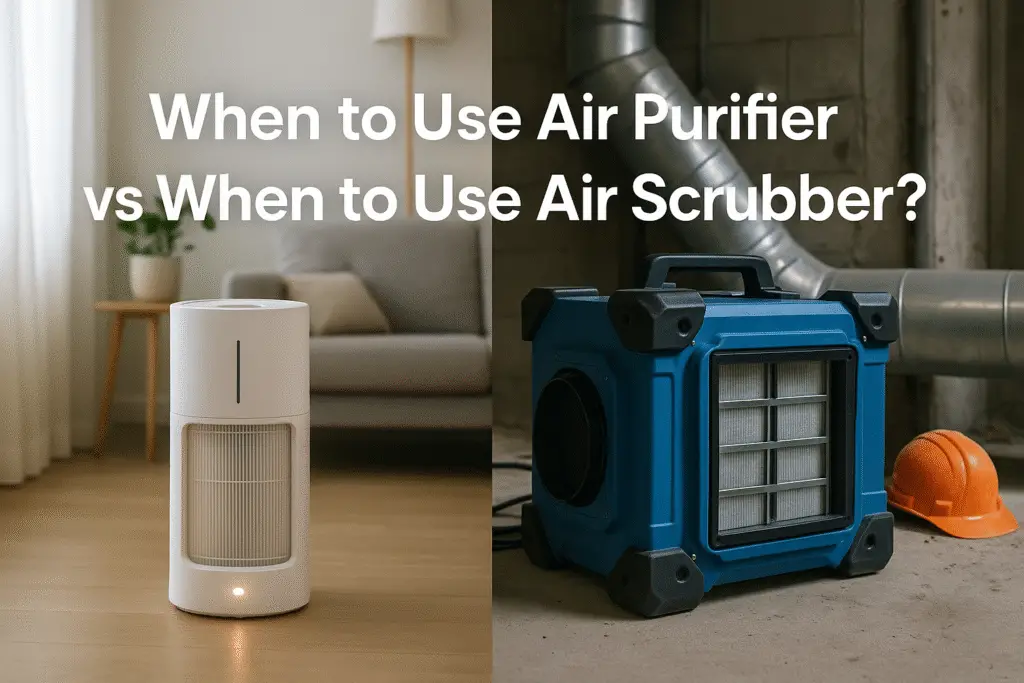
An air scrubber is a portable filtration device that removes particles, gases, and chemicals from the air, improving indoor air quality. Unlike air purifiers that only filter air passing through them, air scrubbers actively pull contaminants from surrounding areas, making them ideal for construction sites, restoration projects, and spaces with significant air quality concerns. Proper use ensures maximum effectiveness in removing dust, allergens, volatile organic compounds (VOCs), and odors.
What is an Air Scrubber and How Does it Work?
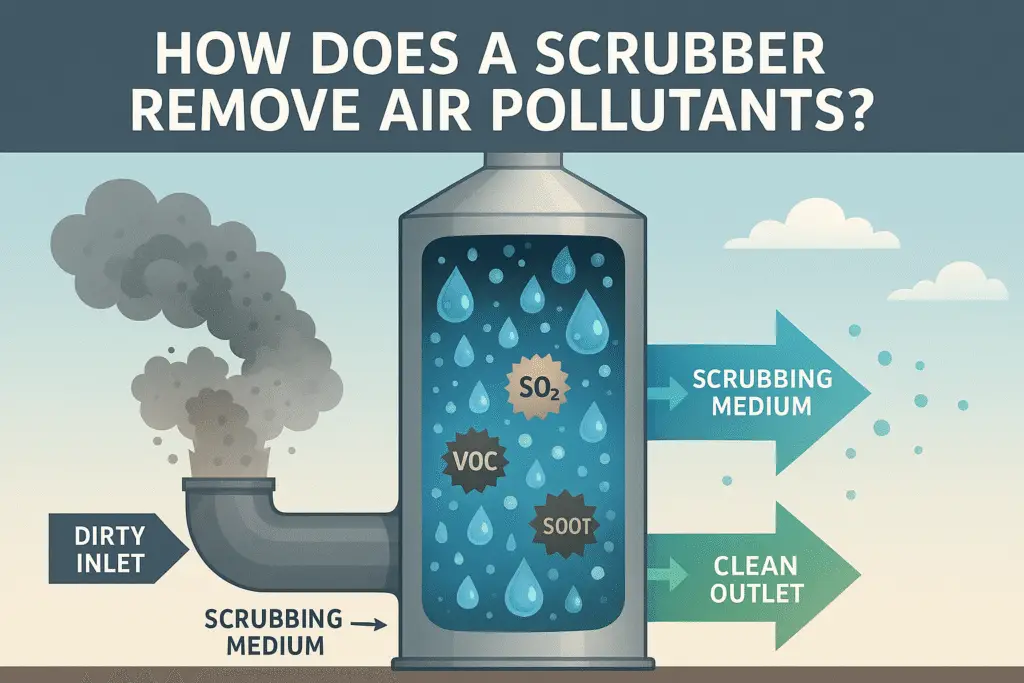
An air scrubber is a powerful air filtration system that removes particulates, gases, and chemicals from indoor environments. It works by drawing air through a series of filters, capturing contaminants, and releasing clean air back into the space.
Unlike standard air purifiers, air scrubbers use more robust filtration technology and are designed for heavy-duty applications. According to the Environmental Protection Agency (EPA), air scrubbers typically employ a three-stage filtration process:
- Pre-filter: Captures larger particles like dust and debris
- HEPA filter: Removes 99.97% of particles as small as 0.3 microns
- Activated carbon filter: Absorbs gases, VOCs, and odors
Some advanced models incorporate additional technologies such as UV-C light to kill microorganisms or photocatalytic oxidation to break down chemical pollutants. These devices are particularly effective in removing construction dust, mold spores, allergens, smoke particles, and chemical fumes.
| Photo | Popular Air Purifiers | Price |
|---|---|---|

|
Air Purifiers for Home Large Room up to 1500ft², Tailulu H13 True HEPA Air Purifier for Pets Dust Odor Smoke, Air Purifier for Bedroom with 15dB Quiet Sleep Mode for Bedroom Office Living Room | Check Price On Amazon |
|
Afloia Air Purifier for Home, 4-in-1 Washable Filter for Allergies, Covers Up to 1076 ft², Quiet Operation, Auto Shut-Off & Night Light, Removes Pet Dander, Pollen, Dust, Mold, and Smoke, White,Pluto | Check Price On Amazon |

|
Nuwave OxyPure ZERO Air Purifier with Washable and Reusable Bio Guard Tech Air Filter, Large Room Up to 2002 Ft², Air Quality Monitor, 0.1 Microns, 100% Capture Irritants like Smoke, Dust, Pollen | Check Price On Amazon |

|
Air Purifiers for Home Large Room Up to 1,996 Ft², EOEBOT Air Purifier for Home Pets with Washable Filter, Quiet Sleep Mode, Air Quality Monitor, Air Purifier for Bedroom, Pet Hair, Dust, Smoke, White | Check Price On Amazon |
|
Afloia 2 IN 1 Air Purifier with Humidifier Combo, 3-Stage Filters for Home Allergies Pets Hair Smoker Odors, Evaporative Humidifier, Auto Shut Off, Quiet Air Cleaner with Seven Color Light,White | Check Price On Amazon |
When Should You Use an Air Scrubber?
Air scrubbers should be used in situations where air quality is significantly compromised or when standard air purifiers aren’t sufficient. According to the Institute of Inspection, Cleaning and Restoration Certification (IICRC), air scrubbers are particularly valuable in the following scenarios:
- Restoration projects: After water damage, fire damage, or flood cleanup
- Construction and renovation: To control dust and chemical fumes
- Mold remediation: To capture airborne mold spores during cleanup
- Medical facilities: To maintain clean air in sensitive healthcare environments
- Industrial settings: To remove chemical fumes and particulates
- Smoke damage cleanup: To eliminate smoke particles and odors
The Journal of Occupational and Environmental Hygiene notes that air scrubbers are essential in environments where particulate levels exceed 150 μg/m³ or when dealing with known contaminants like asbestos, lead dust, or chemical pollutants.
For residential use, air scrubbers provide significant benefits during home renovations, after flooding or fire damage, or in homes with severe allergies or respiratory conditions.
How to Set Up an Air Scrubber Correctly
Proper setup of an air scrubber is crucial for optimal performance. Begin by placing the unit in a central location within the contaminated area to maximize airflow and filtration effectiveness. According to restoration industry standards from the IICRC S500 guide, follow these specific steps:
-
- Inspect the unit: Check for damaged cords, clogged filters, or obstructed air intakes before operation
- Position strategically: Place the scrubber at least 12 inches away from walls or furniture
- Ensure proper airflow: Position the intake facing the most contaminated area
- Create negative pressure: For containment areas, direct filtered air outside using ducting
- Check electrical requirements: Verify the unit is connected to an appropriate power source (typically a dedicated 15-20 amp circuit)
For maximum effectiveness in larger spaces, industry experts recommend calculating the air changes per hour (ACH) using this formula: ACH = (CFM × 60) ÷ room volume in cubic feet. Most remediation projects require 4-6 air changes per hour for effective contaminant removal.
Position multiple units strategically in larger spaces rather than relying on a single unit. This creates a more effective airflow pattern that prevents contaminants from settling.
Setting Up Containment Areas
For projects involving hazardous materials or significant contamination, establishing proper containment is essential. The American Industrial Hygiene Association recommends:
-
-
- Use plastic sheeting with at least 4-mil thickness to create containment barriers
- Seal all seams with tape designed for containment purposes
- Create an anteroom or decontamination chamber for entering/exiting the work area
- Maintain negative pressure of 0.02-0.04 inches of water column within the containment area
- Use a manometer to monitor pressure differentials throughout the project
-
Proper containment prevents cross-contamination and ensures the air scrubber can effectively capture airborne particles without spreading them to clean areas.
How to Determine the Right Size Air Scrubber for Your Space
Selecting the appropriate air scrubber size is crucial for effective air cleaning. The primary factor to consider is the cubic feet per minute (CFM) rating, which indicates how much air the unit can process. According to the American Society of Heating, Refrigerating and Air-Conditioning Engineers (ASHRAE), proper sizing depends on room volume and desired air changes per hour (ACH).
Use this formula to calculate the minimum CFM needed:
Required CFM = (Room volume in cubic feet × Desired ACH) ÷ 60
Industry standards recommend different ACH rates based on the application:
-
-
- Standard residential cleaning: 2-4 ACH
- Mold remediation: 6-8 ACH
- Asbestos/lead abatement: 10-12 ACH
- Healthcare settings: 12-15 ACH
-
For example, a 300 square foot room with 8-foot ceilings (2,400 cubic feet) requiring 6 air changes per hour would need: (2,400 × 6) ÷ 60 = 240 CFM capacity.
The Institute of Inspection, Cleaning and Restoration Certification (IICRC) suggests adding 25% to your calculated CFM to account for filter loading and efficiency losses over time. For the example above, this would mean selecting a unit with at least 300 CFM capacity.
Consider these additional factors when determining the appropriate size:
-
-
- Level of contamination: Heavily contaminated areas require more powerful units
- Filter efficiency: Higher MERV or HEPA ratings may reduce airflow
- Ducting requirements: Each 90° bend in ducting can reduce CFM by 15-25%
- Ceiling height: Taller ceilings increase the volume of air to be filtered
-
How Long Should You Run an Air Scrubber?
The optimal runtime for an air scrubber depends on the specific application and level of contamination. For effective air cleaning, air scrubbers should run continuously until air quality testing confirms contaminant levels have reached acceptable standards.
According to restoration industry guidelines published by the Restoration Industry Association (RIA), these are the recommended minimum run times:
-
-
- Post-construction cleanup: 24-48 hours after visible dust has settled
- Water damage restoration: Until moisture levels return to normal (typically 3-5 days)
- Mold remediation: 24-48 hours after remediation is complete
- Fire damage restoration: 72+ hours for smoke odor removal
- General air quality improvement: 4-8 hours per day for ongoing maintenance
-
Research published in the Journal of Occupational and Environmental Hygiene indicates that air scrubbers achieve approximately 90% of their total contaminant removal within the first 24 hours of operation. However, the final 10% often requires additional time, especially for microscopic particles and odors.
For maximum effectiveness, industry experts recommend calculating the minimum runtime using this formula:
Minimum runtime (hours) = [ln(initial concentration ÷ target concentration) ÷ ACH] × safety factor
Where ACH is air changes per hour and the recommended safety factor is 1.5-2.0.
In practical terms, most remediation professionals continue running air scrubbers for at least 24 hours after the completion of work to ensure thorough air cleaning.
How to Maintain Filters and When to Replace Them
Proper filter maintenance is essential for optimal air scrubber performance. Clogged or damaged filters significantly reduce efficiency and can even recirculate contaminants. According to manufacturer guidelines and ASHRAE standards, follow these maintenance protocols:
Pre-Filter Maintenance
Pre-filters capture larger particles and protect the more expensive HEPA filters from premature loading. Industry best practices recommend:
-
-
- Inspection frequency: Check pre-filters daily during heavy use
- Replacement indicators: Replace when visibly dirty or when airflow decreases by 25%
- Typical lifespan: 1-7 days during active remediation; 2-4 weeks for lighter applications
- Proper disposal: Seal in plastic bags before disposal to prevent releasing captured contaminants
-
HEPA Filter Maintenance
HEPA filters remove microscopic particles and are the primary filtration component. The National Air Filtration Association provides these guidelines:
-
-
- Inspection frequency: Check monthly or when airflow significantly decreases
- Replacement indicators: Replace when filter has darkened throughout, when pressure drop exceeds manufacturer specifications, or after 500-1,000 hours of operation
- Typical lifespan: 500-1,000 hours of operation (approximately 2-6 months of regular use)
- Professional replacement: Consider professional replacement for hazardous material remediation projects
-
Carbon Filter Maintenance
Carbon filters absorb gases, VOCs, and odors. According to environmental health experts:
-
-
- Inspection frequency: Check monthly
- Replacement indicators: Replace when odors persist despite operation or after 300-600 hours of use
- Typical lifespan: 3-6 months under normal conditions
- Storage considerations: Store unused carbon filters in sealed containers to preserve adsorption capacity
-
Maintain a detailed log of filter changes and runtime hours to establish optimal replacement schedules for your specific application. Most manufacturers recommend replacing all filters simultaneously during annual maintenance to ensure optimal performance.
What Safety Precautions Should You Take When Using an Air Scrubber?
Operating air scrubbers safely requires attention to electrical safety, proper handling of contaminated materials, and appropriate personal protective equipment (PPE). According to OSHA guidelines and industry best practices, follow these essential safety precautions:
Electrical Safety
-
-
- Circuit requirements: Connect to properly grounded outlets with adequate amperage (typically 15-20 amps)
- Avoid daisy-chaining: Never connect multiple scrubbers to a single extension cord
- Inspect cords: Check for fraying, damage, or exposed wires before each use
- GFCI protection: Use GFCI-protected outlets when operating in damp environments
- Keep dry: Never operate with wet hands or in standing water
-
Contamination Control
-
-
- Wear appropriate PPE: Minimum N95 respirator, gloves, and eye protection when changing filters
- Proper filter disposal: Double-bag used filters in heavy-duty plastic bags
- Decontamination: Clean the exterior of the unit before removing it from the work area
- Transport protocols: Cover air intakes and outlets during transport to prevent releasing contaminants
-
Operational Safety
-
-
- Maintain clearance: Keep at least 12 inches of clearance around all sides
- Prevent tipping: Place on stable, level surfaces
- Monitor noise levels: Provide hearing protection if operating in confined spaces (most units produce 60-70 dB)
- Avoid blocking: Never cover air intakes or exhaust ports
- Heat management: Monitor for overheating during extended operation
-
According to the American Industrial Hygiene Association, proper training is essential for anyone operating air scrubbers in hazardous environments. This includes understanding contaminant types, containment procedures, and emergency protocols.
For projects involving hazardous materials like asbestos, lead, or certain biological contaminants, consult relevant regulations and potentially hire certified professionals to ensure compliance with all safety requirements.
How to Create Negative Pressure Environments with Air Scrubbers
Creating a negative pressure environment is crucial when containing hazardous materials or preventing cross-contamination during remediation work. An air scrubber with proper ducting can effectively create and maintain negative pressure. According to the CDC and ASHRAE guidelines, follow these steps:
Setting Up Negative Pressure
-
-
- Calculate necessary airflow: For effective negative pressure, the room should experience 4-6 air changes per hour (ACH)
- Seal the containment area: Use 6-mil polyethylene sheeting and tape all seams, windows, doors, vents, and penetration points
- Install ducting: Attach flexible ducting (typically 8-12 inches in diameter) to the air scrubber’s outlet
- Direct exhaust properly: Run ducting outside the building or to another containment zone
- Verify pressure differential: Use a manometer to confirm pressure is between -0.02 and -0.04 inches of water column
-
Research published in the American Journal of Infection Control indicates that maintaining negative pressure requires removing 10-20% more air than is supplied to the space. This creates the pressure differential that prevents contaminants from escaping.
Monitoring and Maintaining Negative Pressure
-
-
- Visual indicators: Install a tissue or micro-manometer at the containment entrance to visually confirm inward airflow
- Regular verification: Check pressure differentials at least twice daily
- Alarm systems: Consider installing pressure differential alarms for critical applications
- Documentation: Maintain logs of pressure readings throughout the project
-
The Institute of Inspection, Cleaning and Restoration Certification (IICRC) recommends creating an anteroom or decontamination chamber between the containment area and surrounding spaces. This two-stage entry system provides an additional buffer zone to maintain pressure differentials and prevent contamination spread.
For complex projects, consider consulting with an industrial hygienist to design an appropriate negative pressure system based on specific contaminants, room geometry, and project requirements.
How to Position Air Scrubbers for Maximum Effectiveness
Strategic placement of air scrubbers significantly impacts their effectiveness in removing airborne contaminants. Based on fluid dynamics principles and industry best practices from the IICRC and ASHRAE, follow these positioning guidelines:
General Positioning Principles
-
-
- Central placement: Position the air scrubber in the center of the space when possible
- Vertical positioning: Place the unit 3-5 feet above the floor for optimal air circulation
- Clearance requirements: Maintain at least 12 inches of clearance around all sides
- Intake orientation: Point the intake toward the most contaminated area
- Outlet direction: Ensure clean air is directed away from contaminated areas
-
Research in the Journal of Occupational and Environmental Hygiene demonstrates that air scrubber efficiency can vary by 30-50% based solely on positioning. Proper placement creates circulation patterns that prevent contaminants from settling and ensures all air volumes are processed.
Specific Scenarios
-
-
- Multi-room spaces: Place units in doorways between rooms, with intake facing the more contaminated area
- High ceilings: Use elevated platforms or suspended mounting to place units at one-third to one-half of ceiling height
- Active work areas: Position units downwind from dust-generating activities
- Mold remediation: Place units at the lowest point in the space since most mold spores eventually settle downward
- Multiple unit placement: Create a circular airflow pattern with units facing the same direction around the room perimeter
-
For large spaces, professional remediation companies use the “15/15 rule” – place units no more than 15 feet apart and no more than 15 feet from any wall. This ensures complete coverage and prevents dead zones where contaminants can accumulate.
According to the National Air Duct Cleaners Association, regularly repositioning units during extended projects can improve overall effectiveness by preventing the formation of stagnant air pockets.
What Are the Noise Considerations When Using Air Scrubbers?
Air scrubbers generate noise that can range from 50 to 75 decibels (dB) depending on the model and operating speed. According to the National Institute for Occupational Safety and Health (NIOSH), extended exposure to noise levels above 85 dB can cause hearing damage, making noise management an important consideration in air scrubber operation.
Understanding Air Scrubber Noise Levels
-
-
- Typical noise range: 50-75 dB (comparable to conversation volume to vacuum cleaner)
- Variable speed models: 50-55 dB on low settings, 65-75 dB on high settings
- HEPA vs. ULPA filters: ULPA filtration typically increases noise by 3-5 dB due to greater air resistance
- Location impact: Noise increases in smaller rooms and spaces with hard surfaces
-
Research published in the Journal of Environmental Health indicates that noise levels increase by approximately 3 dB when air scrubbers are placed directly on hard surfaces rather than on vibration-dampening mats.
Noise Reduction Strategies
To minimize noise disruption while maintaining effective air cleaning, environmental health experts recommend these approaches:
-
-
- Use vibration isolation pads: Place rubber or foam pads under units to reduce structural vibration
- Select appropriate speed settings: Use lower speeds during occupied hours when possible
- Strategic timing: Run units at higher speeds during unoccupied periods
- Create distance: Position units at maximum practical distance from occupied areas
- Install sound barriers: Use acoustic panels or temporary barriers for noise-sensitive environments
- Consider HEPA-EC models: Electronically commutated motors produce less noise than traditional motors
-
For residential applications, the American Academy of Audiology suggests programming air scrubbers to run at higher speeds during daytime hours and reducing to lower speeds during sleeping hours to balance air cleaning needs with comfort.
In healthcare or classroom settings where noise sensitivity is critical, consider using multiple smaller units at lower speeds rather than a single larger unit at high speed to achieve the same air cleaning capacity with reduced noise impact.
How to Combine Air Scrubbers with Other Air Quality Equipment
Integrating air scrubbers with other air quality equipment creates a comprehensive approach to indoor air purification. Research from the Indoor Air Quality Association shows that strategic combinations can address a wider range of contaminants and achieve faster remediation. Here’s how to effectively combine air scrubbers with complementary technologies:
Air Scrubbers and Dehumidifiers
This combination is ideal for water damage restoration and mold prevention:
-
-
- Sequence properly: Run the dehumidifier first to lower humidity below 60%, then introduce the air scrubber
- Position strategically: Place dehumidifiers near moisture sources and air scrubbers in central locations
- Capacity matching: Size both systems appropriately for the space (typical ratio: 1 pint of dehumidification capacity per square foot and 1 CFM of air scrubbing per square foot)
- Monitor humidity: Maintain 30-50% relative humidity for optimal effectiveness
-
According to the IICRC S520 Standard for Professional Mold Remediation, this combination reduces drying time by 20-30% while capturing airborne spores released during the drying process.
Air Scrubbers and HVAC Systems
Coordinating with existing HVAC systems improves whole-building air quality:
-
-
- Filter compatibility: Use higher MERV rating filters in the HVAC system when running air scrubbers
- Air handling adjustments: Set HVAC fan to “on” rather than “auto” for continuous filtration
- Zoning strategies: Use air scrubbers in problem areas while HVAC handles general filtration
- Return air placement: Position air scrubbers near HVAC returns for enhanced filtration
-
The American Society of Heating, Refrigerating and Air-Conditioning Engineers (ASHRAE) recommends this approach for addressing localized contamination while maintaining building-wide air quality.
Air Scrubbers and Air Movers
This combination accelerates contaminant removal and drying:
-
-
- Positioning: Place air movers to direct airflow toward air scrubber intakes
- Ratio guideline: Use 3-4 air movers per air scrubber for optimal circulation
- Staging: Create airflow patterns that move from clean to contaminated areas
- Power management: Ensure adequate electrical capacity (separate circuits preferred)
-
Research in the Journal of Environmental Engineering shows this combination increases particle capture rates by up to 40% compared to air scrubbers alone.
Air Scrubbers and Ozone Generators
Important safety note: Never operate these devices simultaneously in occupied spaces. According to the EPA, ozone can cause respiratory irritation and damage.
-
-
- Sequential use only: Run ozone generators in unoccupied spaces, then ventilate thoroughly before introducing air scrubbers
- Timing protocol: Allow 4-6 hours after ozone treatment before reoccupation and air scrubber operation
- Application specificity: Reserve this combination for severe odor remediation only
- Professional guidance: Consult restoration professionals before implementing this approach
-
By strategically combining air quality technologies, remediation professionals can address multiple contaminant types simultaneously while reducing overall project duration.
How to Monitor Air Quality Improvement When Using Air Scrubbers
Measuring air quality improvements provides objective evidence of air scrubber effectiveness and helps determine when remediation goals have been achieved. According to the EPA and indoor air quality professionals, these monitoring methods provide reliable assessment:
Particle Counting
Particle counters measure the concentration of airborne particulates in different size ranges:
-
-
- Recommended equipment: Laser particle counter capable of detecting PM1.0, PM2.5, and PM10
- Baseline measurement: Take readings before starting air scrubber operation
- Monitoring protocol: Measure at multiple locations, 3-5 feet above floor level
- Target reduction: 80-95% reduction from baseline depending on application
- Typical goal ranges:
- PM2.5: Below 12 μg/m³ (EPA standard)
- PM10: Below 50 μg/m³ (EPA standard)
- Total particle counts: Below 500,000 particles per cubic foot (restoration industry standard)
-
Research published in the Journal of Occupational and Environmental Hygiene demonstrates that effective air scrubbing typically achieves 80% reduction in particle counts within the first 24 hours of operation.
Surface Sampling
Surface sampling verifies that airborne contaminants aren’t resettling:
-
-
- Methods: Tape lift samples, swab samples, or vacuum samples
- Sampling locations: Horizontal surfaces at different heights and distances from the air scrubber
- Frequency: Before remediation, during operation (24-hour intervals), and after completion
- Professional analysis: Submit samples to accredited laboratories for assessment
-
The IICRC S520 Standard recommends comparing post-remediation surface samples to samples from unaffected “control” areas to verify successful contaminant reduction.
Air Quality Monitors
Continuous monitoring provides real-time feedback on air scrubber performance:
-
-
- Equipment options: Professional-grade IAQ monitors measuring multiple parameters
- Key metrics: Particulate matter, VOCs, carbon dioxide, temperature, and relative humidity
- Placement: Position monitors at breathing height (4-6 feet) in representative locations
- Data logging: Record measurements at 15-30 minute intervals
- Trend analysis: Look for consistent downward trends in contaminant levels
-
According to the Indoor Air Quality Association, effective remediation typically shows exponential improvement curves, with rapid initial reduction followed by more gradual improvements.
Professional Testing
For critical applications or when dealing with specific contaminants:
-
-
- Specialized testing: Mold spore trap analysis, VOC assessment, or specific chemical testing
- Clearance criteria: Compare results to industry standards or pre-established project goals
- Third-party verification: Have independent professionals conduct final testing
- Documentation: Maintain comprehensive testing records for project verification
-
The American Industrial Hygiene Association recommends third-party verification testing for all remediation projects involving health hazards or when clearance documentation is required.
What Are Common Mistakes to Avoid When Using Air Scrubbers?
Avoiding common errors ensures air scrubbers operate at maximum effectiveness. Based on remediation industry experience and technical guidelines from the IICRC and ASHRAE, here are the most critical mistakes to avoid:
Sizing and Placement Errors
-
-
- Undersizing: Using insufficient CFM capacity for the space volume
- Poor positioning: Placing units against walls or in corners where airflow is restricted
- Ignoring airflow patterns: Failing to create effective circulation throughout the space
- Incorrect height placement: Positioning units directly on the floor rather than elevated
- Blocking air intakes: Placing units too close to walls, furniture, or other obstacles
-
According to restoration industry data, proper sizing and placement can improve contaminant removal rates by 30-50% compared to poorly positioned units.
Filter Management Mistakes
-
-
- Neglecting pre-filters: Failing to check and replace pre-filters frequently during heavy use
- Improper filter installation: Installing filters incorrectly or with gaps that allow bypass
- Using damaged filters: Continuing to use torn or compromised filters
- Ignoring filter loading: Not accounting for reduced airflow as filters become loaded
- Contamination during changes: Releasing captured contaminants during improper filter changes
-
Research published in the Journal of the Air & Waste Management Association indicates that clogged filters can reduce air scrubber efficiency by up to 70% while increasing energy consumption.
Operational Errors
-
-
- Insufficient runtime: Stopping operation before adequate air cleaning is achieved
- Interrupted operation: Frequently turning units off and on rather than maintaining continuous operation
- Ducting mistakes: Using ducting with too many bends or restrictions
- Electrical overloading: Connecting multiple units to a single circuit without adequate capacity
- Neglecting pressure monitoring: Failing to verify negative pressure in containment situations
-
The National Air Duct Cleaners Association notes that continuous operation is essential for effective air cleaning, as interrupted cycles allow contaminants to resettle and reduce overall effectiveness by 40-60%.
Safety and Maintenance Oversights
-
-
- Inadequate PPE: Changing filters without proper respiratory protection
- Poor documentation: Failing to log runtime hours, filter changes, and maintenance
- Neglecting equipment cleaning: Not decontaminating the exterior of units before removal from work areas
- Improper transport: Moving units without covering air intakes and outlets
- Ignoring manufacturer guidelines: Operating outside recommended temperature ranges or conditions
-
According to OSHA data, proper safety protocols and maintenance procedures not only improve air scrubber performance but also significantly reduce workplace exposure incidents and equipment failures.
How to Choose the Right Air Scrubber for Your Specific Needs
Selecting the appropriate air scrubber involves evaluating several critical factors beyond just size. According to environmental engineering experts and industry standards, consider these key aspects when choosing an air scrubber:
Application-Specific Requirements
-
-
- Residential remediation: Quieter operation (below 60 dB), lower profile design, higher energy efficiency
- Commercial/industrial use: Higher CFM capacity, rugged construction, specialized filtration options
- Mold remediation: HEPA filtration with minimum 99.97% efficiency at 0.3 microns
- Fire restoration: Activated carbon filters for odor control, higher CFM for smoke particles
- Healthcare settings: ULPA filtration (99.999% efficiency at 0.12 microns), antimicrobial coating
- Construction: Durable pre-filters, high dust loading capacity, simplified maintenance
-
Technical Specifications
-
-
- CFM rating: Match to space size (1 CFM per square foot minimum)
- Filter types:
- HEPA (High-Efficiency Particulate Air): Required for most remediation
- ULPA (Ultra-Low Penetration Air): For critical environments
- Activated carbon: For VOCs and odors
- Specialty media: For specific chemicals or gases
- Static pressure capacity: Higher ratings (1-3 inches water gauge) needed for ducted applications
- Power requirements: Standard (110V/15A) vs. specialized (220V) electrical needs
- Variable speed control: Allows adjustment for different applications and noise control
-
The American Conference of Governmental Industrial Hygienists recommends selecting models with static pressure capacities at least 25% higher than calculated requirements to account for filter loading and system restrictions.
Additional Features to Consider
-
-
- Monitoring capabilities: Differential pressure gauges, airflow indicators, filter change indicators
- Portability features: Weight, handles, wheel design, stackability for transport
- Housing construction: Rotomolded plastic (lighter, corrosion-resistant) vs. metal (more durable, better containment)
- Daisy-chain capability: Ability to connect multiple units to a single power source
- Advanced technologies: UV-C light, photocatalytic oxidation, bipolar ionization options
- Noise rating: Measured in decibels (dB), critical for occupied spaces
-
For specialized applications, the Indoor Air Quality Association recommends consulting with certified indoor air quality professionals who can assess specific contaminant profiles and recommend appropriate equipment combinations.
Cost Considerations
-
-
- Purchase vs. rental: Frequency of use determines cost-effectiveness
- Operational costs: Energy consumption (8-15 amps typical), filter replacement frequency and cost
- Warranty coverage: Typically 1-5 years, with extended options available
- Manufacturer support: Availability of parts, technical assistance, and training resources
-
Industry analysis indicates that while initial purchase prices range from $500-$5,000 depending on specifications, long-term operational costs often exceed the initial investment within 1-2 years of regular use.
Conclusion: Maximizing Air Scrubber Effectiveness for Cleaner Indoor Air
Proper air scrubber use significantly improves indoor air quality by removing particulates, chemical contaminants, and odors. According to the EPA, effective air filtration can reduce indoor air pollutants by 80-95% when equipment is correctly sized, positioned, and maintained.
To maximize effectiveness, follow these essential guidelines:
-
-
- Select appropriate equipment: Match CFM capacity to room size and contaminant type
- Position strategically: Place units centrally with proper clearance and airflow patterns
- Maintain filtration systems: Replace filters according to manufacturer guidelines and contamination levels
- Ensure adequate runtime: Operate continuously until air quality goals are achieved
- Monitor performance: Use air quality testing to verify improvement and determine completion
- Follow safety protocols: Use proper PPE and electrical safety measures
-
For professional applications, the Institute of Inspection, Cleaning and Restoration Certification emphasizes the importance of comprehensive training and certification for technicians working with air scrubbers in remediation environments.
By implementing these best practices, air scrubbers can effectively address a wide range of indoor air quality concerns, from everyday dust and allergens to serious contamination from water damage, fire, or construction activities.
Whether for restoration projects, construction cleanup, or ongoing air quality maintenance, proper air scrubber use represents one of the most effective interventions available for creating healthier indoor environments.
References
-
-
- Environmental Protection Agency (EPA). “Guide to Air Cleaners in the Home.” https://www.epa.gov/indoor-air-quality-iaq/guide-air-cleaners-home
- Institute of Inspection, Cleaning and Restoration Certification (IICRC). “S520 Standard for Professional Mold Remediation.” https://www.iicrc.org/page/SANSIIICRCS520
- American Society of Heating, Refrigerating and Air-Conditioning Engineers (ASHRAE). “Standard 62.1-2019: Ventilation for Acceptable Indoor Air Quality.” https://www.ashrae.org/technical-resources/bookstore/standards-62-1-62-2
- Restoration Industry Association (RIA). “Guidelines for Fire and Smoke Damage Repair.” https://www.restorationindustry.org
- National Air Filtration Association. “Understanding MERV Ratings.” https://www.nafahq.org/understanding-merv-ratings/
- Journal of Occupational and Environmental Hygiene. “Effectiveness of Portable Air Cleaners in Removing Airborne Particles in Indoor Environments.” https://www.tandfonline.com/doi/abs/10.1080/15459624.2020.1818027
- American Industrial Hygiene Association. “Recognition, Evaluation, and Control of Indoor Mold.” https://www.aiha.org
- National Institute for Occupational Safety and Health (NIOSH). “Occupational Noise Exposure.” https://www.cdc.gov/niosh/topics/noise/
- Indoor Air Quality Association. “IAQA 01-2000: Recommended Guidelines for Indoor Environments.” https://iaqa.org/standards
-